Butchering a chicken at home doesn’t sound that great for most. We get it, not everyone wants to see the entire process of slaughtering and pruning the chicken. However, one of the biggest benefits of it is that you get to find out how to butcher a chicken in a humane way.
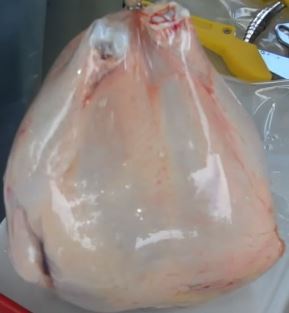
We are often used to getting our whole chicken encased in glass at the supermarket. The question is, how sure are we that the chicken was handled well? Was the chicken butchered humanely? Butchering a chicken is not for the faint of heart (or stomach). It’s a skill that you learn, practice and perfect.
Chicken is probably the most popular meat you can get from any meat store, and that’s why not everyone finds the need to butcher one. Everyone might not be able to try it but we have written this guide on how to butcher a chicken the right way for all who are eager to know.
Benefits of Butchering a Chicken
Not everyone finds it appropriate to slaughter a chicken but find luxury in eating chicken meat. Here’s a list of reasons why we should at least know how to butcher a chicken.
- We can ensure a more humane way of slaughtering a chicken and we can identify it when we check the meat sold at the marketplace
- We will know the proper way of slaughtering and processing chicken for meat
- We are assured of a proper and sanitary handling of the meat we are going to eat.
Materials Needed
Here is a list of things that you will need to butcher a chicken. We’ve also provided alternatives to some procedures that you may not be able to do at home
We need the following materials:

Restraining or Killing cone (highly recommended; this is to be able to kill the chicken the most humane way possible).
This hugs the chicken tightly to keep them calm before you kill them. A wing-flapping stressed chicken produces meat with a different taste. A calmer chicken is much more tender when you cook it. In the absence of a killing cone, you can use a traffic cone. There are times when the chicken is too big for the restraining cone so an old traffic cone nailed to a board or tied to a post will do just fine.

3 Old Buckets or Container
Why too many buckets you ask? They’re for the blood, innards, and feathers. You don’t want to mix all of these things up. Bloodied chicken feathers are extremely difficult to clean up. You can use plastic bags or other containers if buckets are unavailable.

Sharp Butcher Knife and Skinning Knife
Slaughtering a chicken needs the right equipment and a dull knife will make the entire process extremely challenging. A butcher knife is what we often need in slicing meat and it would do a perfect job.
A skinning knife is needed for the small jobs that would be hard to do using the butcher knife.
We have dedicated an entirely different article for the best butcher knives you should have.

Turkey fryer
You need a turkey fryer to scald the chicken with before removing the feathers. You can also just use a hot batch of really hot water to dip the chicken in. You can also use a big pot if you don’t have a turkey fryer.

Poultry shears or large kitchen shears
You will use this to cut the chicken’s head off. You can also use an ax or a meat cleaver. We just prefer poultry shears for a cleaner job.

Containers or heat shrink bags
Heat shrink bags will keep the meat safe from cold burns when you put them in the freezer. You can also store the chicken in plastic containers.

Clean working space with running water
You need a clean working space especially when cleaning and chopping the chicken. Having access to running water is also preferred in order to easily clean the chicken.
Ground Zero: Prepping the Chicken
Butchering a chicken isn’t just about slitting the chicken’s throat. It’s a process that you need to understand to make sure that you are bringing the finest chicken meat on your table. Here are things that you should do first before you butcher a chicken.
- Don’t feed the chicken the night before to prevent a messy cleanup. Fasting the chicken will ensure an empty crop.
- You also need to find a wide and clean working space. Even if you’re just butchering one chicken, you still need a wide space for a more sanitized and organized environment.
Stage 1: From Cull to Dull
Most wouldn’t find it easy to butcher their first chicken. But if you’re ready to go, let’s begin.
1- Put the chicken in the cone.
You can purchase a cone from a local meat shop. Flip the chicken upside down and put it inside the cone with the head in first. Push the chicken in a little further to prevent it from moving too much before you start to butcher it.
Note: While calming the chicken down inside the restraining cone, you should start heating up some water in the turkey fryer or large pot in preparation for the next step.

2- Slit the neck.
Grab the chicken by the beak and turn the head so you can have an easier access to the jugular. To make an easier slit, remove some of the feathers from the neck or push the feathers aside using the knife. When you’re ready, slit the neck. The slit should be deep enough until you can almost feel the knife cutting halfway through the neck. Make sure you do this quickly and do it in one slice. Hacking your way slowly through the neck is rather brutal for the poor chicken.
TIPS:
- You can also grab the entire head and tilt it to the side and quickly slice the side of the neck right underneath the jaw by the jugular of the chicken.
- The knife should be really sharp
3- Let the blood drip.
Let the chicken’s blood drip on the bucket that you’ve prepared. Leave the chicken for a good couple of minutes to let the blood drip well. It will take about 15-20 minutes for the blood to stop dripping.
Stage 2: Fly Feathers Fly
Scalding and removing the chicken feathers are vital in keeping the chicken’s meat nice and plump.

A- Scalding the chicken
Step 1: Heat the water in the turkey fryer until it reaches a preferred temperature of 120 to 160 degrees Fahrenheit.
Step 2: Keep checking on the water to make sure it does not go beyond the temperature or else, you’ll end up cooking your chicken.
Step 3: Add a teaspoon of organic unscented dishwashing soap for every gallon of water. A treated bath can really help a ton in defeathering the chicken by softening the skin and loosening the feathers. It will also treat the feathers in case you may want to use the feathers for other purposes.
Tip: Choose a soap that doesn’t have a scent. Chicken skin is very permeable and strong soapy scents would easily penetrate the meat and would ruin your entire chicken. You can also opt out of the soap overall.
Step 4: Soak the entire chicken from head to its toes. It takes about 3-4 minutes to scald one chicken.

B- Plucking the Feathers
There are two ways of plucking chicken feathers: traditional hand plucking and mechanical plucking.
For mechanical plucking:
- Put the chicken head first into the plucking machine.
- Wait until the plucking machine pulls out all the feathers. This could take about 5 to 10 minutes depending on the machine you have.
- Remove the chicken and rinse the chicken.
- Finally, remove the remaining feathers the machine couldn’t remove.
For Traditional plucking:
- Let the water drip first before you start plucking your chicken.
- Lay the chicken on the table and start plucking the larger feathers. To pull out the feather, grab the feather by the root and pull. Don’t pull from the tip or it will rip and you’re going to have a hard time removing the roots from the skin.
- When roots get left behind, pop it like a pimple. Just press into the skin using your thumb and index finger to ease the root out.
- Next, pluck out the smaller feathers. They will easily come right off. To pluck faster, you can wear rubber gloves. Swiping is faster when you pluck the feathers with the gloves on.

NOTE: The reason why scalding is important is mainly to help in the defeathering process. The heat of the water will help the chicken skin’s pores open for you to easily pluck the feathers off. Not scalding the chicken will result in tearing up the skin of the chicken.
Stage 3: On to the Chop Block
Before moving on to gutting the chicken, give your chicken a nice rinse. Remember, you dipped it in a tub of soapy water. Here’s how you do it.
Cleaning the Chicken
- Grab your chicken by the legs.
- Grab a hose and start rinsing your chicken.
- You can also rinse the chicken on the sink. Simply grab the chicken by the legs or feet and let the running water do its trick.
Tip: It is important to rinse the chicken using running water to make sure that you will get rid of the soap well but in case you don’t have access to running water, having someone hold the chicken and pouring water over it using a dipper is also okay.

Trimming the Chicken
- Get the poultry shears and cut the head off the chicken right where the slit is.
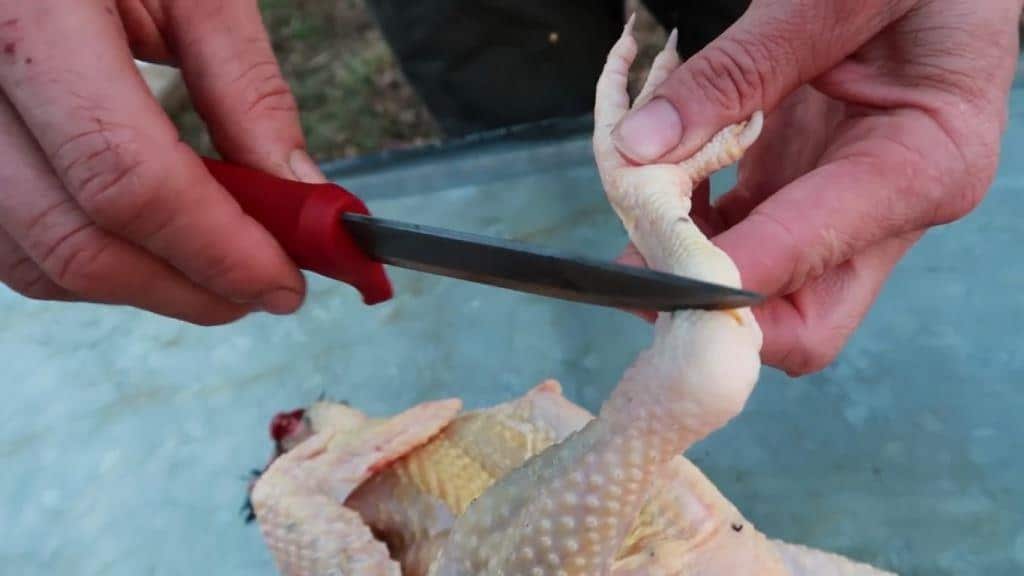
- Grab hold of the chicken by the feet. Cut the feet off by chopping right in between the joints of the chicken feet for a smooth cut. Using shears would work but it’s better to use a cleaver to get a clean cut

Gutting the Chicken

Step 1: The next step is to eviscerate the chicken. Above the breastbone right at the base of the neck, pull the skin and make a thin slice on it.
Step 2: You need to remove three things: the crop, the trachea or windpipe, and the esophagus. The crop is the soft sac that you can find right where you made the incision. Hold the crop and rip the thin layer of fat around it to easily separate it.

Step 3: Besides the crop is the esophagus, do the same thing with the crop and rip off the thin layer of fat around it. Continue further underneath the esophagus and you can find the trachea or the windpipe.
Step 4: Trace the esophagus and the windpipe down until you find the rest of the innards. Cut off the windpipe and the esophagus by cutting right where the air vent stops using a small knife to separate the windpipe and the esophagus from the rest of the internal organs.

Step 5: Turn the chicken around with the butt of the chicken facing you. On top of the butt is an oil gland that is really rancid when you cook it. Slide your skinning knife and trim off the oil gland.
Step 6: Flip the chicken. You can either make a small incision or with your fingers rip the skin right at the base of the chicken butt.
Step 7: Just tug at the skin to make a big hole revealing the insides of the chicken.
Step 8: Trace the inside with your fingers to separate the fat the is encasing the innards then slowly pull out the innards. This will easily come out without a problem.

Step 9: When you pull out the insides of the chicken, you will trace the end of the intestines right at the butt.
Step 10: You will find a small gland at the butt of the chicken. Removing it is vital because when it breaks or ruptures, it will release the poop and digested chicken feeds from the internal organs. Just tug the innards and slowly pull-out the intestines from the butt of the chicken.

Voila! That is how to butcher a chicken the right way!
Here is a video showing you how to eviscerate a chicken.
Things to Remember When Butchering a Chicken
Always use a sharp knife in slitting the throat
One of the most painful things you can do is to hack the throat of a chicken with a dull knife. Your goal in butchering a chicken is to kill it as quickly and with as little pain as possible. The best way to do it is with the use of a sharp knife.
Don’t let the chicken flap like crazy
When killing a chicken, try your best to limit its movement. The killing cone hugs the chicken well and prevents it from getting stressed. When an animal is dying with tons of movement, the meat hardens. This is called rigor mortis – the muscles contract and will get tough. The best way to kill a chicken if you don’t have a killing cone is by knocking it out.
Limit the use of your knife when eviscerating your chicken
Your knife can be your best friend when cleaning out your chicken, but not when removing the internal organs. There are plenty of glands that you don’t want your knife to poke. The best way to remove the innards is with your hands.
FAQs on How to Butcher a Chicken
How long should I let the chicken’s blood drip?
As we’ve mentioned above, you can let the blood drip for 5 to 10 minutes. Some would even say that you can let the blood drip for 1-2 minutes. Either way, once the bleeding stops, you can go ahead and scald your chicken.

How deep should I slit the chicken’s neck?
Slitting the neck of the chicken is the easiest and least painful way of killing it. For a quicker death, the deeper it is the better. Slice right through the windpipe, it will cause a huge gap right under the jaw of the chicken.
How old is the best chicken to butcher?
If we buy broiler chickens ourselves, we should choose a chicken that is at least 16 weeks but not older than 8 months. Young chicken is preferred for meat because younger chickens are more tender. The meat at a tender age are soft and plump and has good fat and meat ratio. The older your chicken is the thinner and tougher the meat will get.
What is the best chicken type for meat?
Broiler culls are chickens that are bred solely for the purpose of providing our table with meat. They practically do nothing but eat and rest and grow. And for those reasons, we get the soft plump chicken we have today.
Can you butcher layer chickens?
Yes, you can. However, expect layer chickens to have tougher, leaner, and thinner meat. Though you can butcher layer chickens, they are not fit for the grill or the roaster. Layer chicken meat is perfect for slow cooked meals like chicken stew. To soften up the meat, we highly recommend that you use your crockpot or pressure cooker.
Our thoughts…
Slaughtering a chicken has more positives that you originally think. Aside from the aforementioned reasons why butchering is important, it is mainly for the reason that we get to have a better understanding and respect for the animal and the process of handling meat. You don’t need to follow the steps we’ve provided faithfully. Once you get used to butchering your own chicken, you can find other ways of making the process easier and more comfortable for you.
